Basic Behavior of jQuery Scripts
One of the most convenient features of jQuery is the fact that nearly all its methods are chainable, which means methods can be executed one right after the other.
 $('p')
.addClass('new-class')
.text("I'm a paragraph!")
.appendTo('body');
or
$('p').addClass('new-class').text("I'm a paragraph!").appendTo('body');
Understanding jQuery Methods
Traversing DOM Elements
Traversal in jQuery is the act of moving from one DOM element to another; traversal is essentially another form of filtering performed after the initial selection has been made. This is useful because it allows developers to complete an action and then move to another part of the DOM without needing to perform another search by selector.
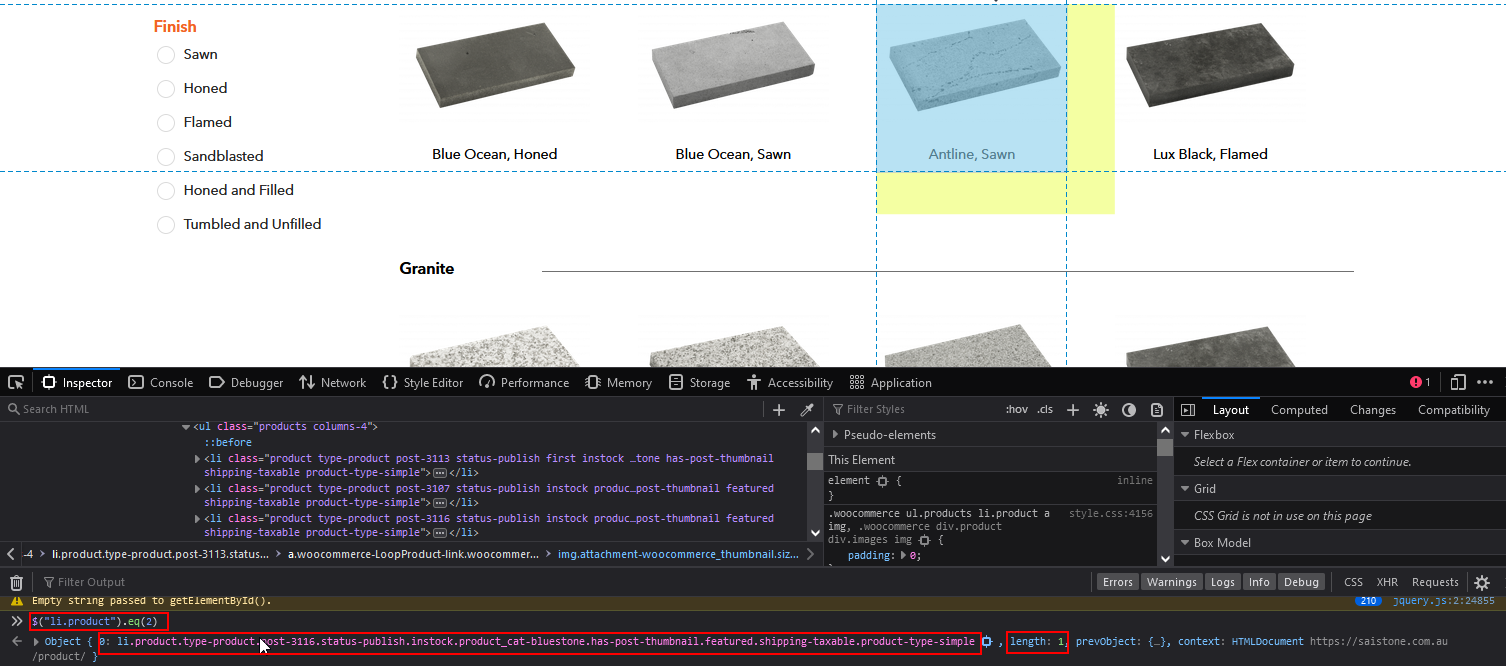
.eq()
If a set of elements needs to be narrowed down to just one element identified by its index, then you’re able to use the .eq() method. This method accepts one argument: an index for the desired element. For .eq(), indices start at 0.
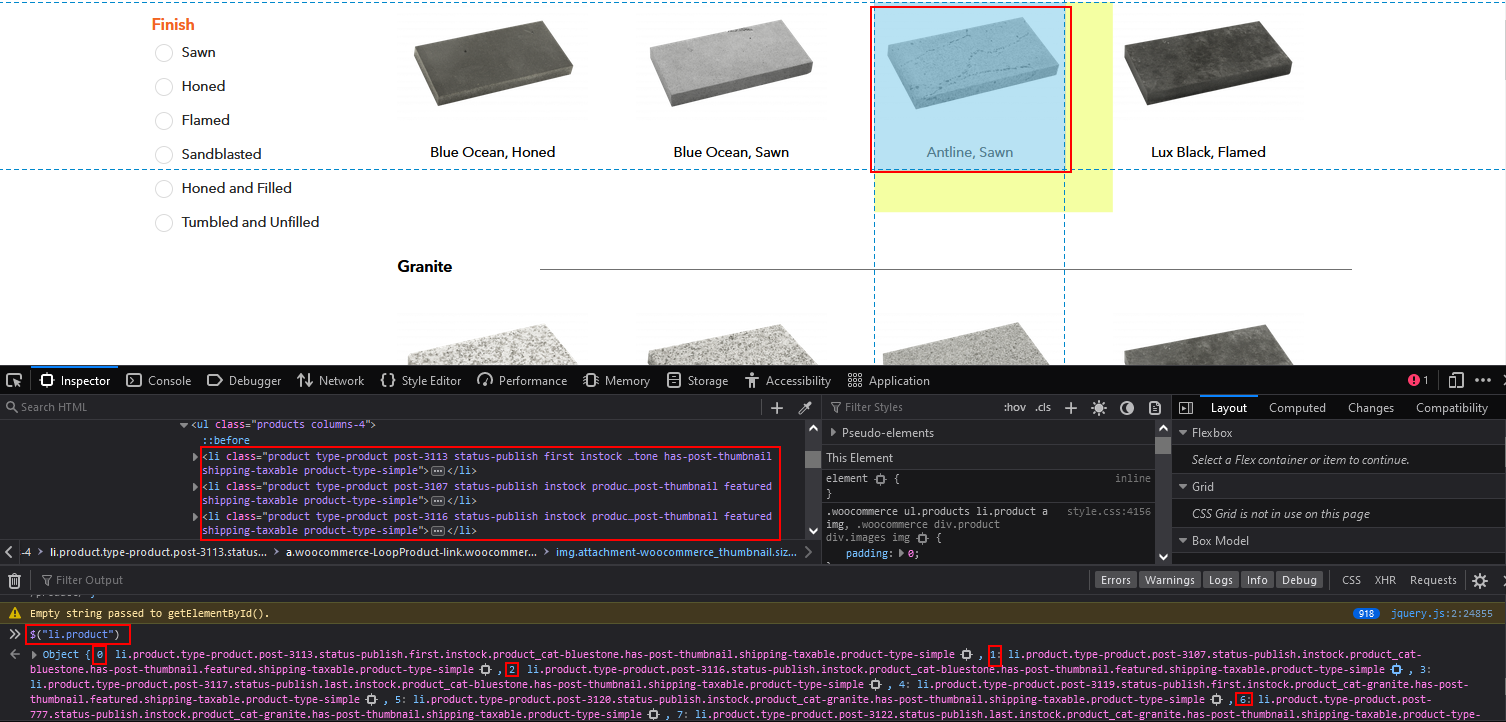
Let’s take a page of products as example, there a list of products with class product.
So $(“li.product”) shows the object list, and the index. And I pointed at the object with index 2.
Now I enter the snippet
.first() and .last()
The .first() and .last() methods work identically to .eq(0) and .eq(-1), respectively. To select the last paragraph from a set of all paragraphs on the page, use the following:
$("p").last();
.filter() and .not()
To use a whole new selector within a set of elements, the .filter() method comes in handy. It accepts any selector that can be used in the jQuery function, but it applies only to the subset of elements contained within the jQuery object.
For instance, to select all paragraphs and then filter out all but the ones with class foo, you would use the following:
$("p").filter(".foo");
The inverse of .filter() is .not(), which will return all elements from a result set that do not match the given selector. For instance, to select all paragraphs and then limit the selection to paragraphs that do not have the class foo, you would use the following:
$(“p”).not(“.foo”);
.has()
To select an element that contains elements matching a certain pattern, you can use the .has() method.
For instance, you would use the following to select all paragraphs and filter the results to only paragraphs that contain a span element:
$("p").has("span");
.is()
The .is() method is a little different from other methods in that it does not return the jQuery object. It evaluates a result set without modifying it, which makes it ideal for use in callback functions or functions executed after the successful execution of a function or method.
You’ll learn more about practical uses of .is() in later examples of this book; right now, select all paragraphs in your test document then check if one has the class foo:
$("p").is(".foo");
The result is a Boolean (true or false) answer.
.slice()
To select a subset of elements based on its index, the .slice() method comes into play. It accepts two arguments: the first is a starting index from which to generate the subset, and the second is an optional ending point. If the second parameter isn’t supplied, the subset will continue until the end of the selection is reached.
.children()
Oftentimes, it becomes necessary to drill down in a result set to find child elements. This is accomplished using the .children() method, which accepts one optional parameter: a selector to match child elements against.
To select all paragraphs and then change the selection to match all child elements of the paragraphs, execute the following code:
$("p").children();
.closest()
The .closest() method is an easy way to find elements up the DOM tree, which is the nesting order of elements (a DOM tree relationship in your example is the span within a paragraph within the body element).
For example, to find the closest paragraph to the span with class foo, run the following code snippet in the console:
$("span.foo").closest("p");
.find()
Similar to the .children() method, the .find() method matches descendants of elements within the current set.
The main difference between .find() and .children() is that .children() only checks one level down in the DOM tree, whereas .find() doesn’t care how deep the matched elements are.
Creating New DOM element
You can also add attributes to this new element by passing a second argument as JavaScript Object Notation (JSON), A sample of JSON data would be:
{ "key":"value" } or { "key1":"value1", "key2":"value2" }.
If you want to create a paragraph like below:
<p class="test">This is a new paragraph!</p>
The JSON syntax will be:
$("<p>", {
"class":"test",
"text":"This is a new paragraph!"
});
This is only creating the element, it hasn’t been attached to the DOM yet and, therefore, isn’t visible in the browser window. We will talk about how to insert new elements in the next section, “Inserting New Elements into the DOM.”
Insert New Elements into the DOM
An important note to make here is that the modification of the DOM is temporary, meaning that any changes made will be reset back to the original HTML document once the page is refreshed. This happens because JavaScript is a client-side language, which means it isn’t modifying the actual files from the server.
.append() and .prepend()
The .append() and .prepend() functions will attach the elements passed as arguments to the jQuery object to which they are chained. The only difference is that .append() attaches the elements at the end, and .prepend() attaches at the beginning.
The content will be appended or prepended inside the matched elements, meaning if you match all paragraphs on the page and append a new sentence, “This was added by jQuery”, it will be appended inside the closing paragraph tag (</p>).:
<p>Test paragraph.</p>
Execute below code:
$("p").append(" This was added by jQuery.");
<p>Test paragraph. This was added by jQuery.</p>
.appendTo() and .prependTo()
$("<p>", {
         "text":"I'm a new paragraph!",
         "css":{"background":"yellow"}
   })
   .prependTo("body");
.after() and .before()
The .after() and .before() methods are similar to .append() and .prepend(), except they add the content outside the element either before or after it, instead of inside the element at the beginning or end.
To add a new paragraph after the paragraph with class foo, use the following snippet:
$("p.foo").after("<p>A new paragraph.</p>");
.insertAfter() and .insertBefore()
The same way that .appendTo() and .prependTo() allow for more concise addition of new elements to the DOM, .insertAfter() and .insertBefore() offer the same alternative for .after() and .before().
To repeat the example from the previous section using .insertAfter(), alter the code to read as follows:
$("<p>", {
         "text":"A new paragraph."
     })
     .insertAfter("p.foo");
.wrap()
The .wrap() method allows developers to enclose existing elements with one or more new elements quickly and easily.
The argument accepted by .wrap() can either be a collection of one or more tags to wrap around the selected elements, or a callback function to generate the tags.
First, wrap all the spans in the example document with a strong tag using the following:
$("span").wrap("<strong />");
.unwrap()
The inverse of .wrap(), .unwrap() will remove tags that surround a given element. It does not accept any arguments; it simply finds the immediate parent element and removes it.
To unwrap the span elements in the example file, execute this code:
$("span").unwrap();
To unwrap a single element, add the wrap to unwrap():
$("span").unwrap("<strong />");
.wrapAll()
If an entire set of elements needs to be wrapped in a new tag, .wrapAll() is used. Instead of individually wrapping each selected element with a new tag, it groups all selected elements and creates one wrapper around the whole group.
To wrap a div element with a yellow background around all paragraphs on the page, use the following code:
var div = $("<div>", {
        "css":{"background-color":"yellow"}
    });
$("p").wrapAll(div);
.wrapInner()
In some cases, it’s desirable to wrap the content of an element but not the tag itself. A good example of this is making an entire paragraph bold: to wrap strong tags around a paragraph is not valid HTML and, therefore, isn’t a desirable solution. Fortunately, jQuery provides .wrapInner(), which wraps everything contained within an element in a new tag.
To italicize all text in the paragraphs on the test page, use the following code:
<p>Paragraph with on id.</p>

$("p").wrapInner("<em />");


<p><em>Paragraph with on id.</em></p>
.remove() and .detach()
To remove an element from the DOM entirely, the .remove() and .detach() methods are used. Both methods remove selected elements from the DOM, but the .detach() method keeps jQuery data for the element intact, which makes it ideal for situations in which an element will be reattached to the DOM at some point.
Both .remove() and .detach() accept an optional selector to filter the elements being removed. In your example, remove all paragraphs with class foo using the following:
$("p").remove(".foo");
When the code is run, the paragraph with class foo is removed from view and is no longer part of the DOM.
Accessing and Modifying CSS and Attributes
attr()
For most element attributes, the .attr() method is used. This method has two purposes:
- The first is to read a given attribute, which is accomplished by supplying the name of the desired attribute as the first argument to the method with no other arguments. The second is to set an attribute by passing the name of the attribute to be set as the first argument and the value to which it is to be set as the second.
First, retrieve the ID of the third paragraph using the following:
$("p:eq(2)").attr("id");
Second, change the id attribute of the third paragraph to 3rdLable
$("p:eq(2)").attr("id","3rdLable")
.removeAttr()
To remove an attribute, simply call .removeAttr() on the element from which you wish to remove the attribute and pass the attribute’s name.
Enable the check box in the sample form by removing the disabled attribute:
$(":checkbox").removeAttr("disabled");
.css()
The .css() method works just like .attr(), except it applies to styling rules. To return a value, pass the name of the value as the only argument to the method; to set a value, pass both an attribute name and a new value for it. Like .attr(), multiple values can be set using JSON format.
To change all elements with class foo to have red text and a yellow background, use the following:
$(".foo").css({
         "color":"red",
         "background":"yellow"
});
.text() and .HTML()
When dealing with the contents of an element, the .text() and .html() methods are used. The difference between the two is that .html() will allow you to read out and insert new HTML tags into an element, where .text() is for reading and writing text only.
If either of these methods is called on an element set with no arguments, the contents of the element are returned. When a value is passed to the method, the existing value is overwritten, and the new one is put in its place.
To read the text out of the paragraph with ID bar, run the following code in the console:
$("#bar").text();
This captures all text (including whitespace) but ignores the span tag.
.val()
Accessing and modifying the content of form elements is accomplished through the .val() method. This method returns the value of an input, or if a value is supplied, sets the value of an input.
Retrieve the value of the submit button in your test form using the following:
$(“:submit”).val();
.data()
it allows you to store information about an element within the jQuery object in a safe, easy manner.
To give the first two paragraphs in the test document nicknames, store the information using .data() and then log it in the console:
$("p:first")
.data("nickname", "Pookie")
.next("p")
.data("nickname", "Shnookums");
console.log("My nickname: "+$("p:first").data("nickname"));
console.log("My nickname: "+$("p:eq(1)").data("nickname"));
Data can be added to an element en masse as in JSON format as well:
$("p.foo").data({
"nickname":"Wubby",
"favorite":{
"movie":"Pretty Woman",
"music":"Sade",
"color":"pink"
}
});

console.log("Nickname: "+$("p.foo").data("nickname"));
console.log("Favorite Movie: "+$("p.foo").data("favorite").movie);
The preceding will produce the following output when executed:
>>> $("p.foo").data({ "nickname":"Wubby",....data("favorite").movie);
Nickname: Wubby
Favorite Movie: Pretty Woman
This can also be done with variable:
$("p.foo").data({
    "nickname":"Wubby",
    "favorite":{
        "movie":"Pretty Woman",
        "music":"Sade",
        "color":"pink"
    }
});
var info = $("p.foo").data(); // cache the data object in a variable
console.log("Nickname: "+info.nickname);
console.log("Favorite Movie: "+info.favorite.movie);