Compression
Three most common compression utilities: compress, GNU zip(gzip), bzip2.
Compress (40-50 percent)
Adaptive Lempel-Zivcoding (LZW),
The file that been compressed by the compress utility will be renamed with a .z filename extension. The compression will preserves the original ownership, modification, and access time for each file that it compresses.
To install, yum install ncompress in fedora or apt-get install ncompress in ubuntu.
syntax: compress [-v | -f | -r] file1 file2 ....
extract: uncompress [-c] file1 file2 ....
use space to separate multiple files.
- -v : verbose option, display the compression ratio during compression.
- -f : with compress, force to compress the symbolic links or very small files; with uncompress, force to overwrite the existing file.
- -r : compress all files in a directory, it will replace all the files within the directory with a compressed file with a .z extension
- -c : display the contents of the compressed file, same as zcat.
Compress can take information from standard input and send it to standard output. eg.
#who | compress -v > file.z
#zcat file.z
#root pts/1 May 27 20:12
zcat : display the contents of a compressed text file.
zmore: similar to zcat, display page by page.
Gzip ( 60-70 percent compresstion ratio)
Lempel-Ziv compression algorithm(LZ77)
The file use .gz extention.
Syntax:
gzip -v | –
extract : gzip -d or gunzip
- -f : with gzip, force to compress the symbolic links or very small files; with gunzip, force to overwrite the existing file.
- level of compression, – number : number can be 1 to 9, default is 6. 1 is the fast and lower compression ration, 9 is the best compression ratio and therefore slower.
Bzip2 (50-75)
Burrows-Wheeler Block Sorting Huffman Coding algorithm. Can not use zcat or zmore , use bzcat .
Syntax: bzip2 [-number | -c | -d | -f | -h | -q | -r | -s | -t | -v} file1 file2 ...
extract: bzunzip2 file1 file2 ...
- -number : same as gzip, the level of compression
- -c : display content
- -d : extract, decompress
- -f : force to compress symbolic or small
- -h : help
- -q : quiet mode, suppresses warning messages
- -r : recursive compress or decompress files in a directory.
- -s : change the suffix, extention other than gz.
- -t: test the decompression
- -v verbose.
system backup
Tape Archive(tar):
syntax:
create a tarball: tar -acvfpr... tarball_file_name file_or_folder name
extract: tar -xvf tarball_name
Append file (Update):
- Unzip the tarball file if it is compressed ( or else you will get an error ):
gunzip tarball_file, the tar.gz file will become tar file.
root@frank:~# tar -uf Documents.tar.gz
tar: Cannot update compressed archives
tar: Error is not recoverable: exiting now
root@frank:~# gunzip Documents.tar.gz - Append the file1 to the tar file:
tar -uf tar_filename file:
root@frank:~# tar -uf Documents.tar air-02.csv
- Compress the tar file into tar.gz file:
gzip tar_file
root@frank:~# gzip Documents.tar
Note.tar.gz or .tgz are called tarballs.
Filename can not be longer than 255 characters
       One of the following options must be used:

       -A, --catenate, --concatenate
              append tar files to an archive

       -c, --create
              create a new archive

       -d, --diff, --compare
              find differences between archive and file system

       -r, --append
              append files to the end of an archive

       -t, --list
              list the contents of an archive

       -u, --update
              only append files that are newer than the existing in archive

       -x, --extract, --get
              extract files from an archive

       --delete
              delete from the archive (not for use on mag tapes!)
COMMON OPTIONS
       -C, --directory DIR
              change to directory DIR

       -f, --file [HOSTNAME:]F
              use archive file or device F (default "-", meaning stdin/stdout)

       -j, --bzip2
              filter archive through bzip2, use to decompress .bz2 files

       -p, --preserve-permissions
              extract all protection information

       -v, --verbose
              verbosely list files processed

       -z, --gzip, --ungzip
              filter the archive through gzip
       -Z, --compress, --uncompress
              filter the archive using the compress utility.
Modern Tar can use xf option to extract any file.
tar xf archive.tar.xz
tar xf archive.tar.gz
tar xf archive.ta
Install unrar
Under Debian or Ubuntu Linux, you need to type apt-get command as follows to install unrar program:
# apt-get install unrar
If you are using Fedora core Linux / CentOS / RHEL, use yum command as follows:
# yum install unrar
If you are using FreeBSD, enter:
# pkg_add -v -r unrar
If any of above, methods is not working for you, download binary package from official rarlab site:
$ cd /tmp

$ wget http://www.rarlab.com/rar/rarlinux-3.6.0.tar.gz
Next, untar file, enter:
$ tar -zxvf rarlinux-3.6.0.tar.gz
Both unrar and rar commands are located in rar sub-directory. Just cd to rar directory, type:
$ cd rar

$ ./unrar
Now copy rar and unrar file to /bin directory, type:
# cp rar unrar /bin
Similar program: Use unrar Command
The unrar command supports various options, below are common options that you need to for extracting files.
example: Exreact rar (unpack) File
To extract file.rar file into the current directory, enter:
$ unrar e file.rar
example: List (l) file inside rar archive:
$ unrar l file.rar
example: To extract (x) files with full path type command:
$ unrar x file.rar
To test (t) integrity of archive, file type command:
$ unrar t file.rar
cpio
support longer filenames and can back up device files.
syntax: first generate a list of filenames: find /root/sample
Second, send this list via standard input to the cpio command: find /root/sample | cpio -vocB -O /dev/st0
/dev/st0 is the device to store the backup.
-0--null
[copy-in,copy-out,copy-pass] Read a list of filenames terminated by a null character, instead of a newline, so that files whose names contain newlines can be archived. GNU find is one way to produce a list of null-terminated filenames. This option may be used in copy-out and copy-pass modes.
-a--reset-access-time[copy-out,copy-pass] Reset the access times of files after reading them, so that it does not look like they have just been read.
-A--append[copy-out] Append to an existing archive. Only works in copy-out mode. The archive must be a disk file specified with the -O or -F (–file) option.
-b--swap[copy-in] Swap both halfwords of words and bytes of halfwords in the data. Equivalent to -sS. This option may be used in copy-in mode. Use this option to convert 32-bit integers between big-endian and little-endian machines.
-B[copy-in,copy-out,copy-pass] Set the I/O block size to 5120 bytes. Initially the block size is 512 bytes.
--block-size=block-size[copy-in,copy-out,copy-pass] Set the I/O block size to block-size * 512 bytes.
-c[copy-in,copy-out,copy-pass] Use the old portable (ASCII) archive format.
-C io-size--io-size=io-size[copy-in,copy-out,copy-pass] Set the I/O block size to io-size bytes.
-d--make-directories[copy-in,copy-pass] Create leading directories where needed.
-D dir--directory=dir[copy-in,copy-out,copy-pass] Change to the directory dir before starting the operation. This can be used, for example, to extract an archive contents in a different directory:
$ cpio -i -D /usr/local < archiveor to copy-pass files from one directory to another:
$ cpio -D /usr/bin -p /usr/local/bin < filelistThe -D option does not affect file names supplied as arguments to another command line options, such as -F or -E. For example, the following invocation:
cpio -D /tmp/foo -d -i -F arcinstructs
cpioto open the archive file arc in the current working directory, then change to the directory /tmp/foo and extract files to that directory. If /tmp/foo does not exist, it will be created first (the -d option) and then changed to.
-E file--pattern-file=file[copy-in] Read additional patterns specifying filenames to extract or list from file. The lines of file are treated as if they had been non-option arguments to cpio. This option is used in copy-in mode,
-f--nonmatching[copy-in] Only copy files that do not match any of the given patterns.
-F archive--file=archive[copy-in,copy-out] Archive filename to use instead of standard input or output. To use a tape drive on another machine as the archive, use a filename that starts with ‘hostname:’, where hostname is the name or IP address of the machine. The hostname can be preceded by a username and an ‘@’ to access the remote tape drive as that user, if you have permission to do so (typically an entry in that user’s ~/.rhosts file).
--force-local[copy-in,copy-out] With -F, -I, or -O, take the archive file name to be a local file even if it contains a colon, which would ordinarily indicate a remote host name.
-i--extractRun in copy-in mode. See Copy-in mode.
-I archive[copy-in] Archive filename to use instead of standard input. To use a tape drive on another machine as the archive, use a filename that starts with ‘hostname:’, where hostname is the name or IP address of the remote host. The hostname can be preceded by a username and an ‘@’ to access the remote tape drive as that user, if you have permission to do so (typically an entry in that user’s ~/.rhosts file).
-l--link[copy-pass] Link files instead of copying them, when possible.
-L--dereference[copy-in,copy-pass] Copy the file that a symbolic link points to, rather than the symbolic link itself.
-m--preserve-modification-time[copy-in,copy-pass] Retain previous file modification times when creating files.
-M message--message=message[copy-in,copy-out] Print message when the end of a volume of the backup media (such as a tape or a floppy disk) is reached, to prompt the user to insert a new volume. If message contains the string ‘%d’, it is replaced by the current volume number (starting at 1).
-n--numeric-uid-gid[copy-in] Show numeric UID and GID instead of translating them into names when using the –verbose option.
--no-absolute-filenames[copy-in,copy-out] Create all files relative to the current directory in copy-in mode, even if they have an absolute file name in the archive.
--no-preserve-owner[copy-in,copy-pass] Do not change the ownership of the files; leave them owned by the user extracting them. This is the default for non-root users, so that users on System V don’t inadvertantly give away files. This option can be used in copy-in mode and copy-pass mode
-o--createRun in copy-out mode. See Copy-out mode.
-O archive[copy-out] Archive filename to use instead of standard output. To use a tape drive on another machine as the archive, use a filename that starts with ‘hostname:’, where hostname is the name or IP address of the machine. The hostname can be preceded by a username and an ‘@’ to access the remote tape drive as that user, if you have permission to do so (typically an entry in that user’s ~/.rhosts file).
--only-verify-crc[copy-in] Verify the CRC’s of each file in the archive, when reading a CRC format archive. Don’t actually extract the files.
-p--pass-throughRun in copy-pass mode. See Copy-pass mode.
--quiet[copy-in,copy-out,copy-pass] Do not print the number of blocks copied.
-r--rename[copy-in] Interactively rename files.
extract cpio -i
Software installation
rpm
- view the packages installed on your computer:
rpm -aq - View the information about a software:
rpm -qi software_name - View the locations of all files that belong to a software package:
rpm -ql software_name - Search packages by keyword, note that the keyword may be in the package description:
yum search keyword | less - Search package available for installation, the keyword only in the package name:
yum list available | grep software_name - Remove a package without removing the dependencies:
rpm -e --nodeps PAKETNAME
Tar ball (./config, make , make install)
|
This tutorial is aimed at those who have just started using Linux. Generally when users from the Windows background enter the Linux scene,they are totally stumped by the software installation method. They were used to the luxury of double clicking on a single file and getting their software installed. But now they have to type cryptic commands to do the same. Though the installation instructions tell them what to do, they have no idea what those steps actually do. This article shall explain the basics of software installation. After reading this article you would feel more at home when installing your next software. Generally beginners tend to search desperately for RPMs since installing RPMs is a real simple task. But this article doesn’t talk about RPMs. It deals with the softwares that you generally get in the zipped formats as tarballs.
Generally you would get Linux software in the tarball format (.tgz) This file has to be uncompressed into any directory using tar command. In case you download a new tarball by the name game.tgz, then you would have to type the following command $ tar xfvz game.tgz This would create a directory within the current directory and unzip all the files within that new directory. Once this is complete the installation instructions ask you to execute the 3 (now famous) commands : configure, make & make install. Most of the users do this and successfully install their softwares. But most of the newbies have no idea what this really does. The rest of the article shall explain the meaning of these 3 commands Each software comes with a few files which are solely for the purpose of installation sake. One of them is the configure script. The user has to run the following command at the prompt $ ./configure in Linux or ./config in Unix (MAC) The above command makes the shell run the script named ‘ configure ‘ which exists in the current directory. The configure script basically consists of many lines which are used to check some details about the machine on which the software is going to be installed. This script checks for lots of dependencies on your system. For the particular software to work properly, it may be requiring a lot of things to be existing on your machine already. When you run the configure script you would see a lot of output on the screen , each being some sort of question and a respective yes/no as the reply. If any of the major requirements are missing on your system, the configure script would exit and you cannot proceed with the installation, until you get those required things. The main job of the configure script is to create a ‘ Makefile ‘ . This is a very important file for the installation process. Depending on the results of the tests (checks) that the configure script performed it would write down the various steps that need to be taken (while compiling the software) in the file named Makefile. If you get no errors and the configure script runs successfully (if there is any error the last few lines of the output would glaringly be stating the error) then you can proceed with the next command which is $ make ‘ make ‘ is actually a utility which exists on almost all Unix systems. For make utility to work it requires a file named Makefile in the same directory in which you run make. As we have seen the configure script’s main job was to create a file named Makefile to be used with make utility. (Sometimes the Makefile is named as makefile also) make would use the directions present in the Makefile and proceed with the installation. The Makefile indicates the sequence, that Linux must follow to build various components / sub-programs of your software. The sequence depends on the way the software is designed as well as many other factors. The Makefile actually has a lot of labels (sort of names for different sections). Hence depending on what needs to be done the control would be passed to the different sections within the Makefile Or it is possible that at the end of one of the section there is a command to go to some next section. Basically the make utility compiles all your program code and creates the executables. For particular section of the program to complete might require some other part of the code already ready, this is what the Makefile does. It sets the sequence for the events so that your program does not complain about missing dependencies. One of the labels present in the Makefile happens to be named ‘ install ‘ . If make ran successfully then you are almost done with the installation. Only the last step remains which is $ make install As indicated before make uses the file named Makefile in the same directory. When you run make without any parameters, the instruction in the Makefile begin executing from the start and as per the rules defined within the Makefile (particular sections of the code may execute after one another..thats why labels are used..to jump from one section to another). But when you run make with install as the parameter, the make utility searches for a label named install within the Makefile, and executes only that section of the Makefile. The install section happens to be only a part where the executables and other required files created during the last step (i.e. make) are copied into the required final directories on your machine. E.g. the executable that the user runs may be copied to the /usr/local/bin so that all users are able to run the software. Similarly all the other files are also copied to the standard directories in Linux. Remember that when you ran make, all the executables were created in the temporary directory where you had unzipped your original tarball. So when you run make install, these executables are copied to the final directories. Thats it !! Now the installation process must be clear to you. You surely will feel more at home when you begin your next software installation. |
Lab Reflection
1. Problems: the backuped file by CPIO is not visible by ls command?
use mount I got this line:
/dev/sdb1 on /run/media/frank/e4693878-f8ed-41af-b7c3-04a2a3e4a37c type ext4 (rw,nosuid,nodev,relatime,resuid=0,resgid=0,errors=continue,data=ordered,uhelper=udisks2)
If I use the ls command to check out the backup file, it will feed back with an error message:
[root@localhost tartest]# cd /run/media/frank/e4693878-f8ed-41af-b7c3-04a2a3e4a37c/
[root@localhost e4693878-f8ed-41af-b7c3-04a2a3e4a37c]# ls -l
ls: reading directory .: Input/output error
total 0
Anyway, we can use CPIO command to verify that the backup was successful and the backup file is there:
[root@localhost e4693878-f8ed-41af-b7c3-04a2a3e4a37c]# cpio -vitB -I /dev/sdb1
drwxr-xr-x 2 root root 0 May 10 09:57 /tartest
-rwxrwxr-x 1 frank frank 449 May 10 09:57 /tartest/script_color.Z
-rw-r–r– 1 root root 74 May 10 09:57 /tartest/date.bz2
-rw-rw-r– 1 frank frank 14 May 10 09:57 /tartest/file2\256\270\034
cpio: Malformed number 0001FFE)
cpio: Malformed number 1W0081B4
?—-w—- 1 53687191 frank 91 May 10 09:57 /tartest/test1.gz
-rw-rw-r– 1 frank frank 129 May 10 09:57 /tartest/t\275\b\002
-rwxrwxr-x 1 frank frank 389 May 10 09:57 /tartest/script_color~.Z
-rw-rw-r– 1 frank frank 129 May 10 09:57 /tartest/test.Z
1 block
2.
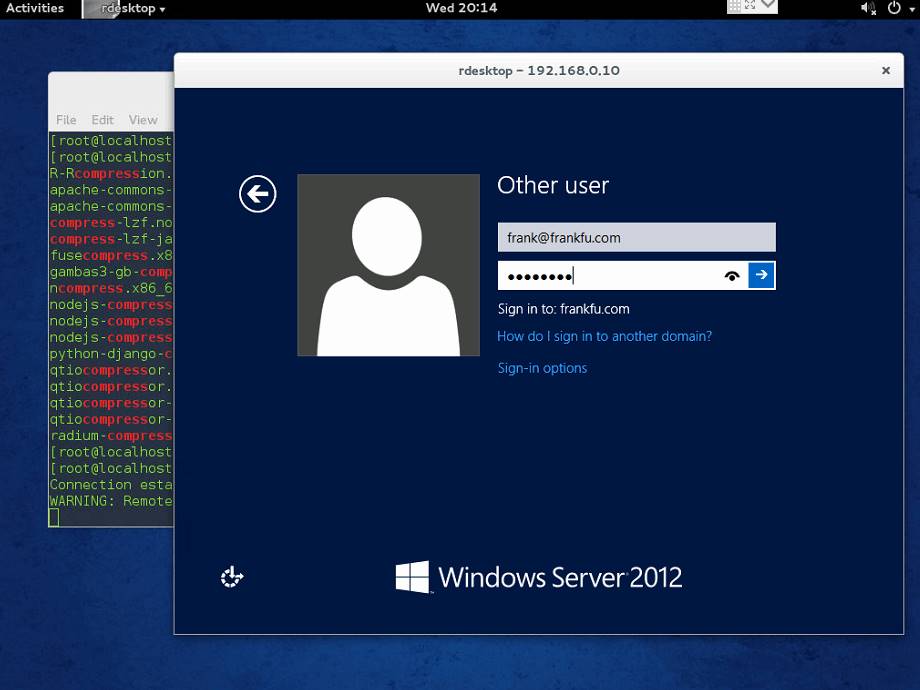
In the hands on project, we installed Rdesktop on the Linux by source code.
In the first time, I downloaded the source code from the official website, but there was no configure file, then I downloaded another one from the sourceforge.com which was a intact one. And everything went well. Ok, let’s go ahead to test the software.
Test the software:
Windows server: 192.168.0.10/24, with a username [email protected]
Fedora: 192.168.0.60/24
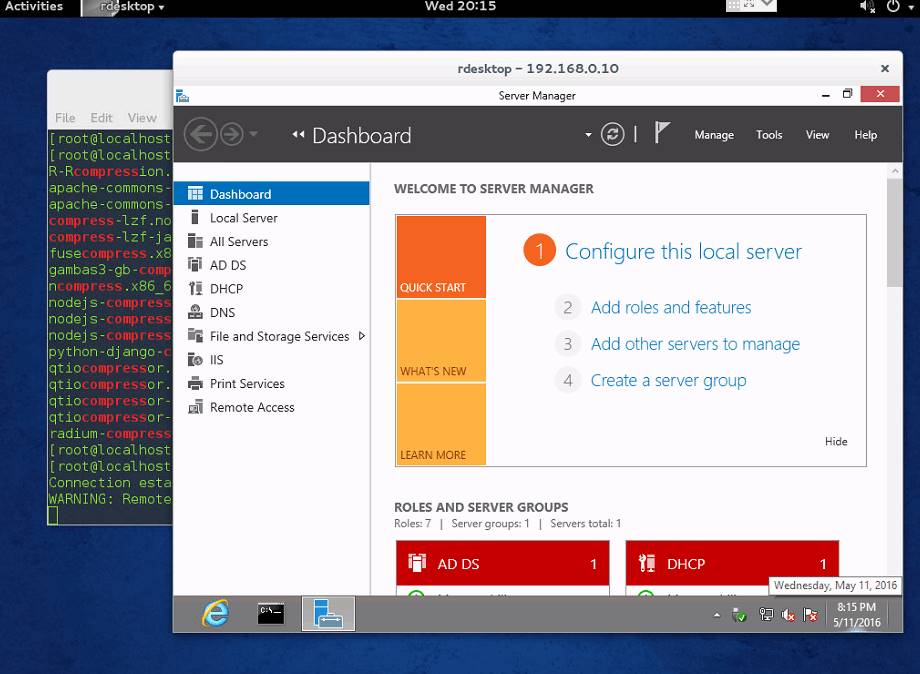
The easiest way to enable rdesktop to connect to any given Windows machine first requires making a few changes to properties and firewall permissions on the Windows box itself.
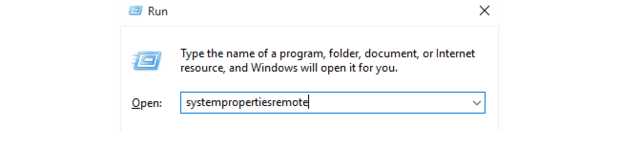
To start, hit the Windows+R key combo and open system properties remote to view the System Properties dialog.
Click the Remote tab, choose the Allow remote connections to this computer option, and uncheck Allow connections only from computers [using] NLA.
Then switch back to the Fedora, issue command: rdesktop -u frankfu.com 192.168.0.10 .