With CentOS, the following issue could not be resolved, so gave up on it, ubuntu 16.04 LTS works perfect
mail.from.address [Value cannot be empty.] is NOT valid

financial.global.currency-code [null] is NOT valid [main]
 2017-10-13 22:21:35,439 WARN ConfigPropImpl:640 - mail.from.address [Value cannot be empty.] is NOT valid [main]
 2017-10-13 22:21:35,450 WARN ConfigManager:1348 - configuration is NOT ready to run: administration needed [main]
Financial options: The ISO 4217 currency code of the financial subsystem can be entered here during installation. When the application status is “ready-to-use” the code can only be changed by using a Server Command:
/opt/savapge/server/bin/linux-x64/savapage-cmd --change-base-currency --from <text(3)> --to <text(3)>
User source:
→ .
- Host prompt: Enter the hostname or IP address of the LDAP server.
- Port prompt: Enter the IP port of the LDAP server. The value defaults to
389. - Tick the checkbox to use encrypted SSL connection to connect to the LDAP server. The LDAP server requires SSL support to be enabled and should accept connections on the standard LDAPS port
636. - Enter the Base DN of the LDAP server at the Base DN prompt. This is the equivalent of the “suffix” config setting of the OpenLDAP server. For example, if the domain hosted by the LDAP server is “domain.com” then the Base DN might be:
DC=domain,DC=comThe format of the Base DN can differ significantly depending on the configuration. Some older Novell eDirectory installations may require a blank Base DN to operate. Some examples:DC=myorganization,DC=com DC=mycompany,DC=co,DC=uk OU=OrgUnit,DC=domain,DC=com DC=local
- Admin DN is the DN of the user who has permission to connect to and query the LDAP server. This is typically an administrative user, use
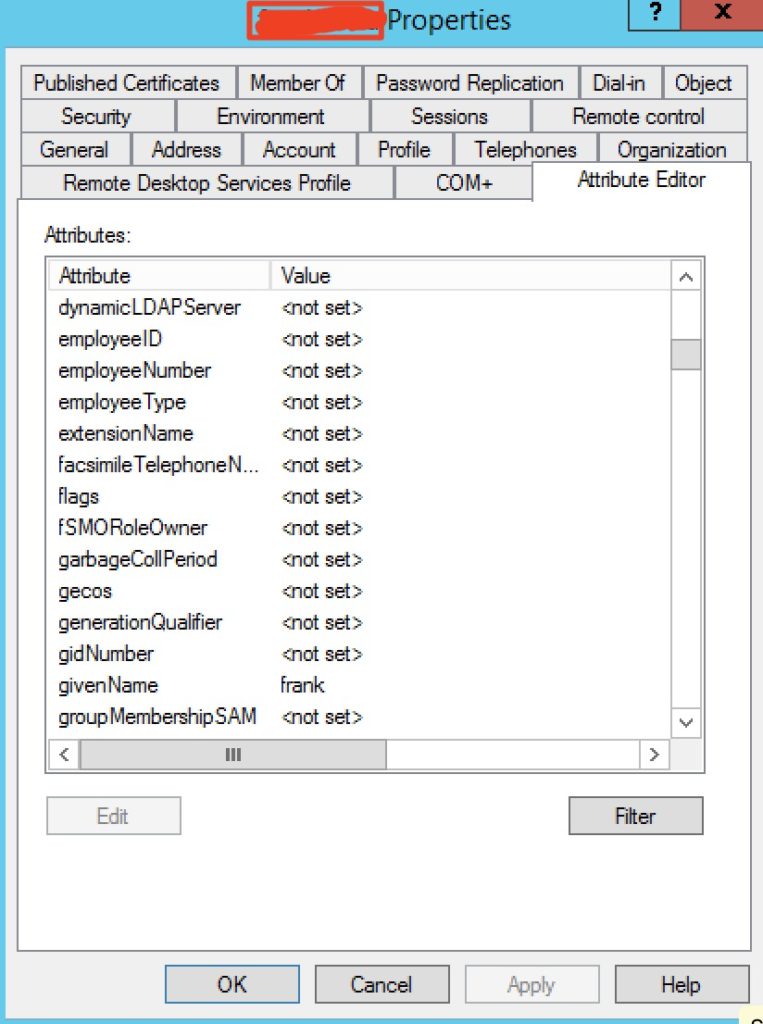
get-aduser administrator, note down the DistinguishedName for this field. e.g.. CN=administrator, OU=users,DC=domain,DC=com - LDAP fields for alternative authentication : This will use two field in the AD user attribute, in ADUC find any user, right click choose Properties, click tab Attribute Editor, in my example, the ID number will mirror employeeNumber ( not employeeID) and Card number will mirror attribute pager, so I enter employeeNumber in the ID number field, and pager in the Card Number field. Shown as bellow:

Add printer to Proxy printer
Access cups from another computer
By default cups admin page can only be accessed from localhost, if you want to access it from a remote host, use command:
cupsctl --remote-adminThen open a browser, type the ip address of the cups service server with port 631, such as 192.168.10.51:631/admin.
Then click Administration tab, Under Printers, click Add Printer. In the Add Printer page, choose a printer you want to setup as the proxy printer, click continue, other part as similar as setup printer on a windows machine, research if have a problem.
The printer on the linux machine needs to be setup for options such as input tray, paper size, ext, use following command to list the current options:
$ lpoptions -l
Collate/Collate: False *True
RICollateKind/Collate Type: *Normal RotateCollate ShiftCollate
PageSize/PageSize: A3 *A4 A5 A6 B4 B5 B6 Legal GovernmentLG EngQuatro Letter Statement F Folio FanFoldGermanLegal Tabloid 12x18 11x15 10x14 Executive Env10 EnvMonarch EnvC5 EnvC6 DLEnv 8Kai 16Kai
InputSlot/InputSlot: MultiTray *1Tray 2Tray 3Tray 4Tray 5Tray Auto
ColorModel/Color Mode: *Grayscale
...
Look for an option that seems to specify the input or tray to use. If it has an Auto value that is not the current one (ie *Auto), then set it with eg
$ lpoptions -o InputSlot=Auto
$ lpoptions -o PageSize=A4
Swipe card to release
Direct Print Release
When a print job is issued for a printer secured with Direct Print Release, a dialog is shown prompting the user to swipe his card to release the print job.
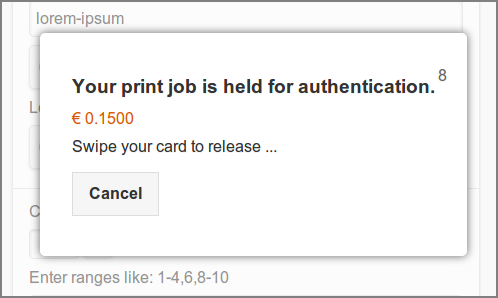 |
Figure 3.37. User Web App: Printer – Direct Print Release
- The cost of the print job is shown in orange.
- A countdown of the remaining seconds for the card swipe is shown in the top right corner of the pop-up. The time limit (seconds) is contained in configuration key
proxy-print.direct-expiry-secs. See Section 4.10.15.10, “Config Editor” on how to change this value.
ACR122U-A9 Smart NFC Reader is tested.
Reference
Official manual: https://www.savapage.org/docs/manual/index.html