Study and Lecture note
Terminology:
- RDC( Remote desktop connection)
- RD CAPs(Remote desktop connection authorization policies): enables you to specify which users can connect to the remote desktop gateway server, specify the requirements that users must meet, and whether to enable or disable client device redirection.
- RD RAPs(Remote desktop resource authorization policies): enable you to specify the network resources that users can connect to, specify the user groups and computer groups, and specify whether to use the default TCP port 3389 or another port.
- RD Web Access: make RemoteApp programs and connection to RD server desktop available to users from a web browser.
- SSO(single singn-on): A feature that enables users to enter their credentials once and be able to access other systems and services without having to reenter their credentials each time.
- Monitor spanning: max resolution of 4096 X 2048.
- PNP device redirection(Plug and play): PNP devices can be redirected from the local device to the remote desktop services session. It is based on MTP( media transfer protocol) and PTP( picture transfer protocol).
Desktop experience
Desktop experience improves end user experiences, it is intended to look and feel like a Windows 7 desktop.Some display enhancement include:
- Enhanced display resolution: Wide-screen monitor( 1680X1050 and 1920X1200), max of 4096X2048.
- Custom display resolutions.
- Monitor spanning, span multiple monitors with a total maximum resolution of 4096X2048.
- Font smoothing, supports clear type fonts.
- Display data prioritization: it controls the bandwidth ratio of input versus output prioritization. The default is 70:30 ratio of input to output, this can be modified in registry.
Command
- Desktop width: desktopwidth:i:<width> eg. desktopwidth:i:1280
- Desktop height: desktopheight:i<height> eg. desktopheight:i:800
- Monitor spanning: span:i<0-disable;1-enable> eg. span:i:1
mstsc.exe
- Desktop width: mstsc.exe /w:<width> eg. mstsc.exe /w:1280
- Desktop height: mstsc.exe /h:<height> eg. mstsc.exe /h:800
- Monitor spanning: mstsc.exe /span eg. mstsc.exe /span
Remote Desktop Service Prerequisite
1, enable desktop experience on the Remote Desktop Services server
2. Use the windows vista theme on the remote desktop services server.
3. Enable Desktop composition on the host client.
Device redirection
Enables a device to be connected to the local device but be accessible through the Remote Desktop Services session. Reduce the problems associated with differing device and print drivers on the client and the Remote desktop services session.
- PNP device redirection: This ability is based on MTP( media transfer protocol), PTP(picture transfer protocol). Devices can be redirected when they are attached after the session has been established.
- MS point of sale for .NET device redirection: Enables supported point of sale devices, such as bar code readers, to be used with Remote Desktop Services. Make sure you have the most recent version of MS POS.
- Remote desktop easy print: Enables redirection of the default printer without having to match print drivers on the client computer and server.
SSO
- Client must be windows vista or higher( xp sp3) or win2008.
- User rights and permissions must be adequate to access the application or system.
- Client and the Remote Desktop Session Host Server must be in the same domain.
Best practices:
- Ensure that client computers have the most up-to-date remote desktop connection version.
- Use remote desktop services desktop experience if you want users to connect to the remote desktop Session host server and have the windows vista dsktop look.
- Use the single sing-on capability to allow domain users to only have to log on once and have access to the resources available on the server.
- It is not recommended to install the Remote Desktop session host server role on a domain controller; if you try to , you will get a warning message.
- You can use a Remote desktop gateway server with MS Internet security and Acceleration(ISA) server to provide enhanced security options.
- RemoteApp programs can be made available through Remote Desktop Web Access; however, the client must be running at least RDC 6.1, which is included on windows Server 2008, Windows Vista Sp1 and higher, Windows XP sp3.
- When you are determining which programs to include in your RemoteApp programs, ensure that you properly test the programs to ensure they operate properly in this environment.
- When you make RemoteApp programs available over the Internet, use the Remote desktop gateway to ensure that you properly secure the remote connections to the server.
- Remote desktop gateway provides a secure encrypted connection for remote users; remote users do not need to configure virtual private network (VPN) connection.
- Network Access Protection (NAP) can be used to further enhance security when using the remote desktop gateway and remote desktop services client.
Lab
Setup RDS session host Service
Step 1. Install RDS service: Go to server manager, click Dashboard in the left pane, then click Add roles and features in the right pane, click next.
Step 2. Select Remote Desktop Services installation, click next.

Step 3. Deployment Type, select the Standard deployment, click next.
Step 4. Deployment Scenario, select session-based desktop deployment.
Step 5. Review Role Services, Remote desktop Connection Broker, Remote Desktop Web Access, Remote Desktop Session Host are listed here, click next.
Step 6. RD Connection Broker, select the local computer under Server Pool, click the right arrow, to add it to the Selected list, then click next.
Step 7. RD web access, select the local computer under Server Pool, click the right arrow, to add it to the Selected list, then click next.
Step 8. RD session Host, local computer under Server Pool, click the right arrow, to add it to the Selected list, then click next.
Step 9. Confirmation: Tick Restart the destination server automatically if required. click Deploy. Then the server will configure and reboot.
Configure RDS
Go to Server manager, click the Remote Desktop Service.
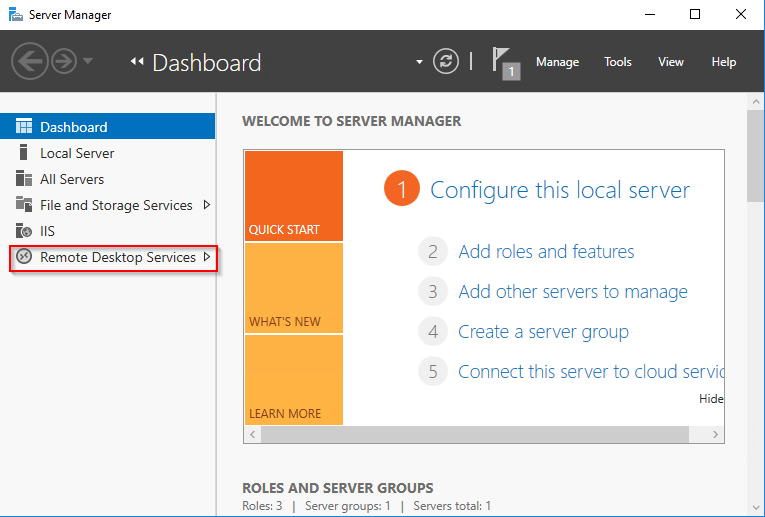
Add RD licensing
under the Deployment Overview, click RD licensing,
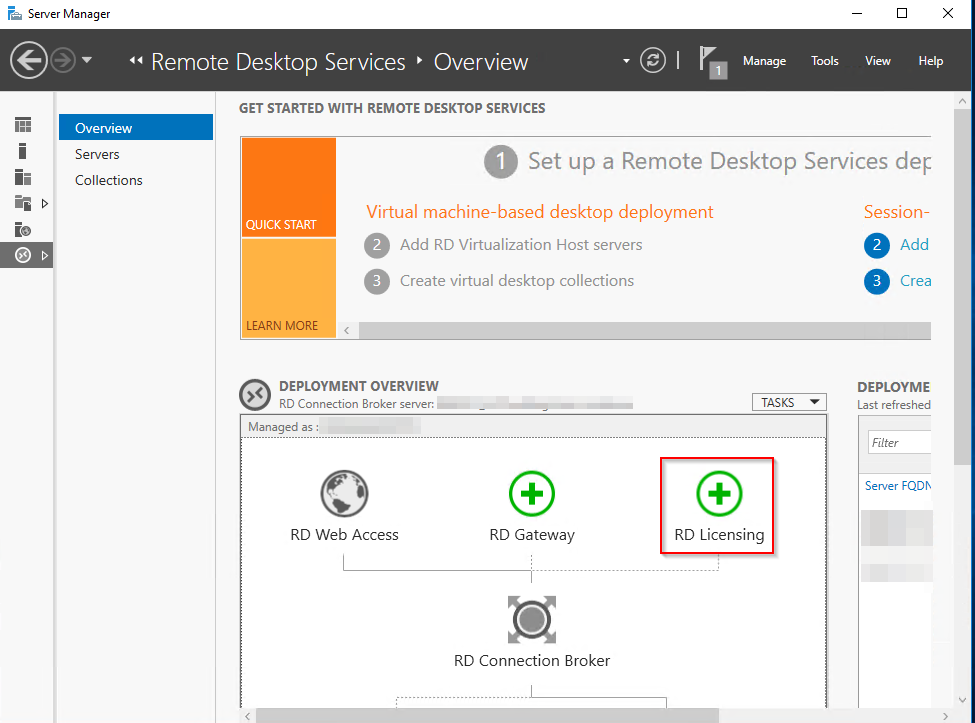
Select the server in Server Pool, and add it to the selected. Click next. Then click Add. Then click next until finish.
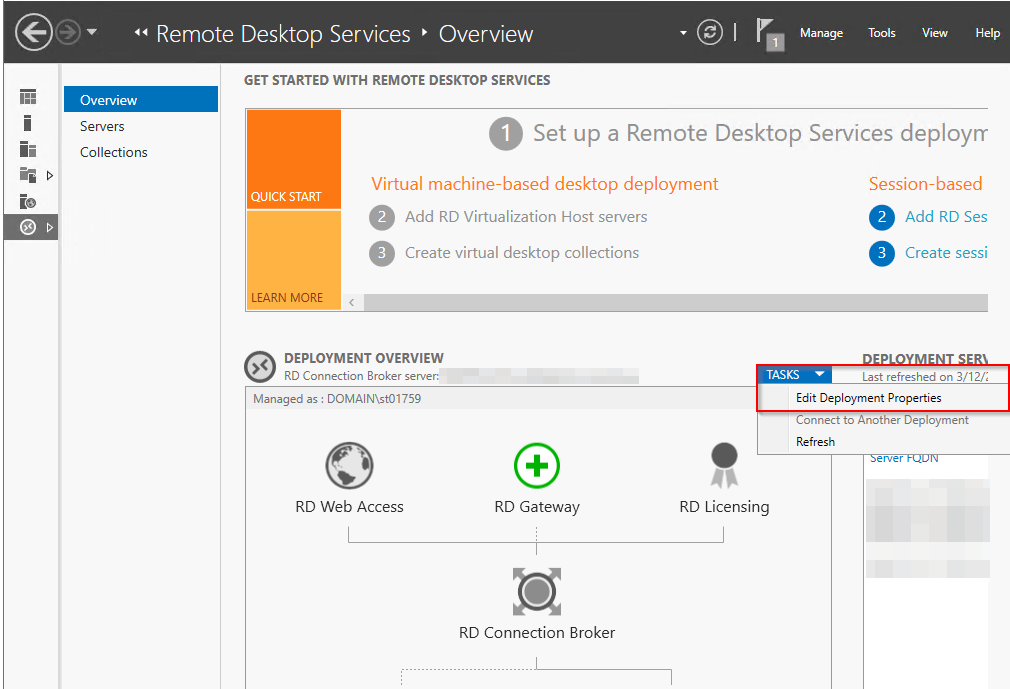
Install Cetificate
under deployment overview, click TASKS > Edit Deployment Properties.
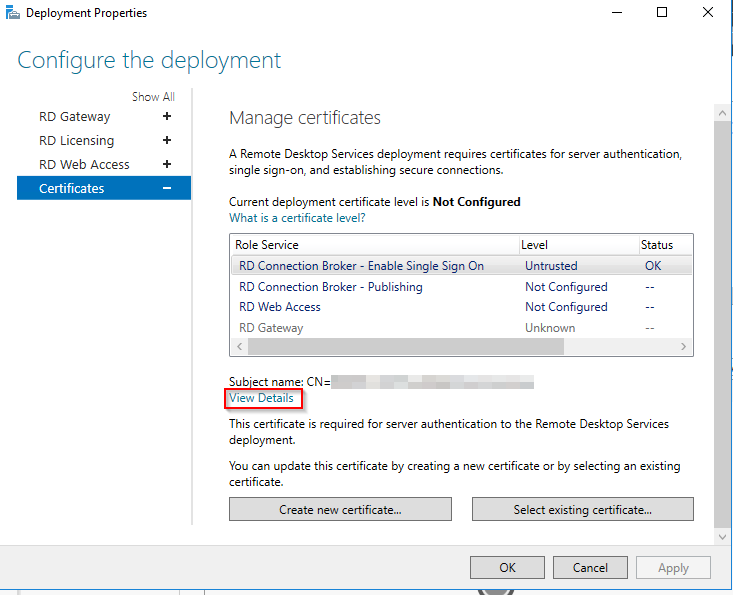
Click Certificates on the left pane, then click the RD Connection Broker – Enable Single Sign On click one of below:
Existing Cert from PKI or CA:
If your company has PKI installed, you can issue a Web server certificate from the CA, see here for how to configure. once the server got the certificate, you need to export it and we will import it into RDS by click Select existing certificate…
Self-signed Cert:
Click the Create new certificate…, the Certificate name should match the server FQDN, give it a password, tick Store this certificate, and click Browse.. to select a path to save. Tick Allow the certificate to be added to the Trusted Root Certification Authorities certificate store on the destination computers. Then click OK. And click Apply in the Deployment Properties window. After a few minutes, you will see the status is OK, but Level is untrusted. click the detail, you will find the issuer is the RDS server itself.
Do the same process for other Role Services: RD connection Broker – Publishing, RD Web Access.
SSO: Ensure that the Security Layer value is Negotiate or SSL(TLS 1.0); uncheck the ” always prompt for password”. Note that we need to use group policy to allow default credential usage on the Remote Desktop Session Host server.
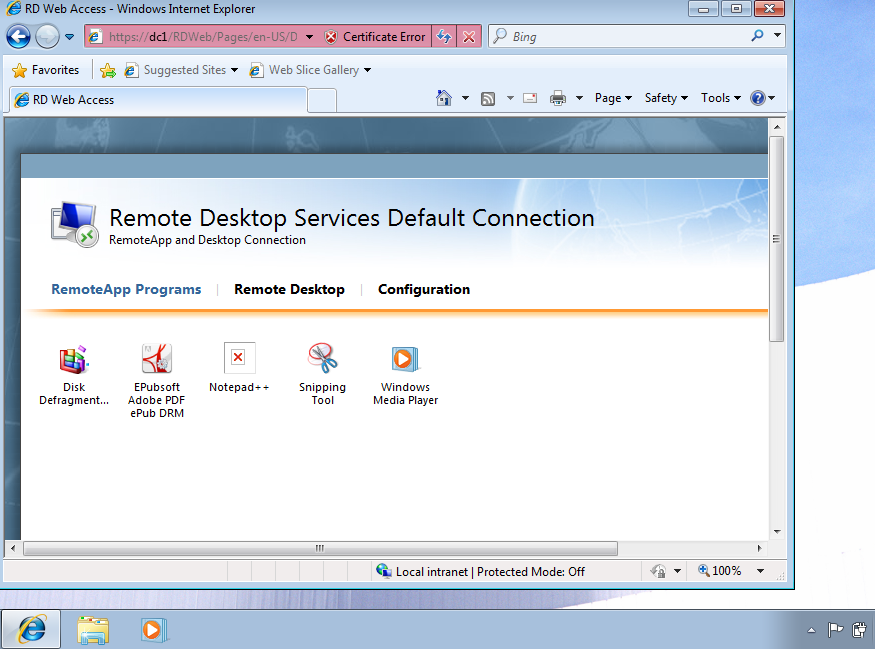
In the setting up of the RemoteAPP programs List, I chose Snipping tool which is located in C:\windows\system32\SnippingTool.exe. Then I fired up an win7 virtual host which is connecte to the Win2008, and open the Remote Desktop Connection, after filling up the computer address in the “General” tab, click the “programs” tab, bellow the “Program path and file name”, fill “%SYSTEMDRIVE%\windows\system32\SnippingTool.
Create Collections
A session collection holds the apps and desktops you want to make available to users. After you create the collection, publish it so users can access it.
Create a pooled desktop session collection
- In Server Manager, click Remote Desktop Services > Collections > Tasks > Create Session Collections.
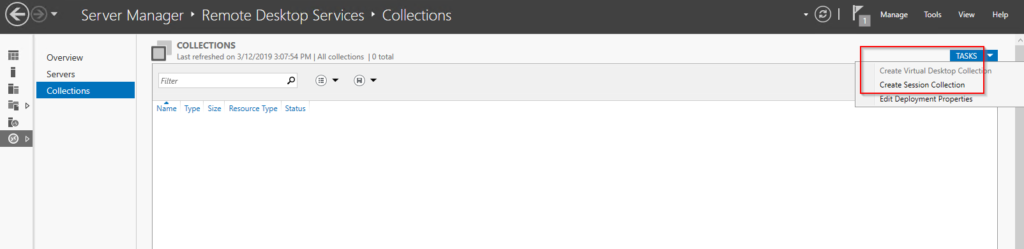
- Enter a name for the collection, for example ContosoAps.
- Select the RD Session Host server you created .
- Accept the default User Groups.
- Enter the location of the file share you created for the user profile disks for this collection (for example, \Contoso-Cb1\UserDisksr).
- Click Create. When the collection is created, click Close.
Publish RemoteApp programs:
Use the following steps to publish the apps and resources in your collection:
In Server Manager, select the new collection (ContosoApps).
Under RemoteApp Programs, click Publish RemoteApp programs.
Select the programs you want to publish, and then click Publish.
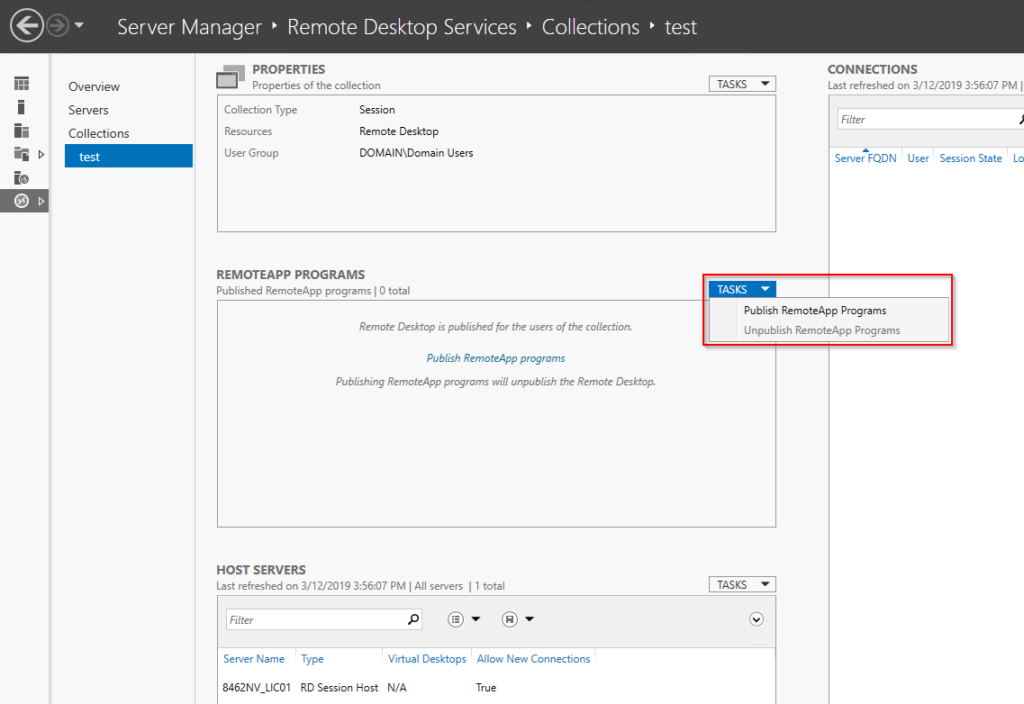
The advantage over the RDC is that, we can choose the available apps from the page without inputting the path of the applications, we can also switch between the apps without disconnecting and reconnecting from and to the server, respectively.
Third party software can be used for remote access:
Features: With support for video, voice-only, and text chat, TeamViewer also allows file transfers, supports wake-on-LAN (WOL), and can even remotely reboot a PC into Safe Mode and then reconnect automatically.
2. Remote Utilities: It works by pairing two remote computers together with what they call an “Internet ID.” You can control a total of 10 PCs with Remote Utilities.
Linux remote desktop solution(Redhat):
-
Install in Redhat: yum install vnc vnc-server
-
For each user that needs to gain access to the VNC server,set a VNC password for them:
-
su vncuser
-
vncpasswd
-
- Edit VNC server: edit the /etc/sysconfig/vncservers file. At the end of that file, enter the following:
VNCSERVERS="1:vncuser"
VNCSERVERARGS[1]="-geometry 1600x1200"
- Start the VNC service, we can either manual start it by
- service vncserver start
- service vncserver stop
Or start it from the boot up: chkconfig vncserver on
5. Create xstartup scriptsYou now need to go into each user that will be logging in with VNC and editing their ~/.vnc/xstartup script. Within that script, you should find the following:
#!/bin/sh
# Uncomment the following two lines for normal desktop:
# unset SESSION_MANAGER
# exec /etc/X11/xinit/xinitrc
[ -x /etc/vnc/xstartup ] && exec /etc/vnc/xstartup
[ -r $HOME/.Xresources ] && xrdb $HOME/.Xresourcesxsetroot -solid grey
vncconfig -iconic &
xterm -geometry 80x24+10+10 -ls -title "$VNCDESKTOP Desktop" &
twm &
6. Uncomment the following two lines (remove the “#” characters):
- unset SESSION_MANAGER
- exec /etc/X11/xinit/xinitrc
Save that file and you’re ready to move on.
7. Edit iptablesIn order for the VNC connections to get through, you must allow them with iptables.
To do this, open up the file /etc/sysconfig/iptables and add the line:
-A INPUT -m state —state NEW -m tcp -p tcp -m multiport —dports 5901:5903,6001:6003 -j ACCEPT
Save the file and restart iptables with the command:
service iptables restart
Issue the command:
service vncserver start
8.Test the connection
open up the browser and go to http://ADDRESS_OF_VNC_SERVER:5801. That address should open up a VNC session in your browser. If, on the off chance, it does not… try the address http://ADDRESS_OF_VNC_SERVER:1
Reference
http://pcsupport.about.com/od/remote-access/tp/free-remote-access-software.htm