PREPARATION
In order to compile and use mrtg you need a C compiler and a copy of perl installed on your machine. In most cases this will already be available. In case it is not, here are some starting points. Below I’ll give you a detailed run through the whole compilation process.
- GCC
-
The GNU C compiler comes preinstalled on most of the free Unicies out there. For commercial derivatives you may have to download and compile it first. If you have no compiler at all there is a chicken and egg problem, but there are also precompiled versions of gcc available for most operating systems.
http://gcc.gnu.org/
- Perl
-
Large parts of the MRTG system are written in the Perl scripting language. Make sure there is a recent copy of perl on your machine (try perl -v). At least version 5.005 is required for mrtg to work well. If you use SNMPV3 and other new features you should use at least 5.8.
You can get the latest perl from
http://www.perl.com/
MRTG generates traffic graphs in the PNG format. To be able to do this it needs several 3rd party libraries. When compiling these libraries I urge you to make sure you compile them as static libraries. There is just much less trouble ahead if you are doing it like this. See the Instructions in the next section for inspiration. Note that many free unices have all the required libraries already in place so there is no need to install another copy. To check it is best to skip all the library instructions below and go straight into the mrtg compile.
If the first attempt fails and you do not get a working version of mrtg, try compiling new copies of all libraries as explained below. Do this BEFORE you send email to me about problems compiling mrtg.
- gd
-
This is a basic graph drawing library created by Thomas Boutell. Note that all releases after Version 1.3 only create PNG images. This is because a) Thomas got into trouble because the GIF format which it used to produce uses a compression technology patented by Unisys. b) PNG is more efficient and patent free. MRTG can work with old and new version of the GD library. You can get a recent copy of GD from:
http://www.boutell.com/gd/
- libpng
-
Is required by gd in order to produce PNG graphics files. Get it from:
http://www.libpng.org/pub/png/libpng.html
- zlib
- Is needed by libpng to compress the graphics files you create. Get a copy from
http://www.gzip.org/zlib
And last but not least you also need mrtg itself. In case you have not yet downloaded it, you can find a copy on my website:
http://oss.oetiker.ch/mrtg/pub
LIBRARY COMPILATION
Note, that the version here may not be downloadable, try to find the available link from the official website.
In this section I will give you step by step instructions on how to compile the various libraries required for the compilation of mrtg. Note that these libraries may already be installed if you have a *BSD or Linux system so you can skip recompiling them. The wget program used below is a simple web downloader. You can also enter the address into your netscape if you don’t have wget available.
First let’s create a directory for the compilation. Note that this may already exist on your system. No problem, just use it.
 mkdir -p /usr/local/src
 cd /usr/local/src
If you do not have zlib installed:
 wget http://www.zlib.net/zlib-1.2.3.tar.gz
 gunzip -c zlib-*.tar.gz | tar xf -
 rm zlib-*.tar.gz
 mv zlib-* zlib
 cd zlib
 ./configure
 make
 cd ..
If you don’t have libpng installed
 wget ftp://ftp.simplesystems.org/pub/libpng/png/src/libpng-1.2.40.tar.gz
 gunzip -c libpng-1.2.34.tar.gz | tar xf -
 mv libpng-* libpng
 cd libpng
 env CFLAGS="-O3 -fPIC" ./configure --prefix=$INSTALL_DIR
 make
 rm *.so.* *.so
 cd ..
And now you can compile gd
Note that you do rename the folder name of the library above, or you need to change the /zlib /libpng into your own name, or else you will get error in the following gd installation.
For versions starting around 2.2.4, try:
 wget https://github.com/libgd/libgd/releases/download/gd-2.2.4/libgd-2.2.4.tar.gz
 gunzip -c libgd-2.2.4.tar.gz |tar xf -
 mv libgd-2.2.4 gd
 cd gd
 env CPPFLAGS="-I../zlib -I../libpng" LDFLAGS="-L../zlib -L../libpng" \
     ./configure --disable-shared --without-freetype --without-jpeg
 make
 cp .libs/* .
MRTG COMPILATION
Ok, now everything is ready for the mrtg compilation.
 cd /usr/local/src
 wget https://oss.oetiker.ch/mrtg/pub/mrtg.tar.gz
 tar -zxvf mrtg.tar.gz
 cd mrtg
If all the libraries have been preinstalled on your system you can configure mrtg by doing a simple:
./configure --prefix=/usr/local/mrtg-2
Otherwise you may have to give some hints on where to find the various libraries required to compile mrtg:
 ./configure --prefix=/usr/local/mrtg-2       \
             --with-gd=/usr/local/src/gd      \
             --with-z=/usr/local/src/zlib     \
             --with-png=/usr/local/src/libpng
If you have RRDtool available you might want to tell mrtg about it so that you can opt to use rrdtool with mrtg. Check mrtg-rrd.
Configure will make sure your environment is fit for building mrtg. If it finds a problem, it will tell you so and it will also tell you what to do about it. If everything is OK, you will end up with a custom Makefile for your system. Now type:
make
This builds the rateup binary and edits all the perl pathnames in the scripts. You can now install mrtg by typing
make install (requires gnu install)
All the software required by MRTG is now installed under the /usr/local/mrtg-2 subdirectory.
You can now safely delete the libraries we compiled above. Then again, you might want to keep them around so that you have them available when compiling the next version of mrtg.
Configuration
Configure SNMP on Cisco Router or switch:
snmp-server community string ro | rw SNMP_ACL ip access-list standard SNMP_ACL permit xx.xx.xx.xxLogin on the Linux machine and go to the www_root folder (it’s something like “/var/www/html/”), then make a new folder and go inside:
[root@linux-ciscozine ~]#
[root@linux-ciscozine ~]# cd /var/www/html/
[root@linux-ciscozine html]# mkdir Cisco-MRTG
[root@linux-ciscozine html]# cd Cisco-MRTG/
Create the MRTG configuration files based on information pulled from the Cisco element, using the “cfgmaker” command (192.168.1.20 is the Cisco IP address):
It’s always good practice to put the configuration files in the /etc directory:
sudo midir /etc/mrtg
sudo /usr/local/mrtg-2/bin/cfgmaker --global "WorkDir: /var/www/html/Cisco-MRTG" --output /etc/mrtg/Cisco-MRTG.cfg [email protected]
You will get a configuration file named Cisco-MRTG.cfg in the Folder: /etc/mrtg/Cisco-MRTG.cfg
We will talk about how to customize it later.
Create the Main web page which display the status of an array of mrtg interface status pages, using the “indexmaker” command:
sudo /usr/local/mrtg-2/bin/indexmaker --output index.html /etc/mrtg/Cisco-MRTG.cfg
Then create all the sub pages and pictures with the configuration file:
env LANG=C /usr/local/mrtg-2/bin/mrtg /etc/mrtg/Cisco-MRTG.cfgnow you can enter the http://URL/Cisco-MRTG/index.html, in a web browser. however, this is still a static webpage. By default it will automatically refresh every 5 minutes, you can check it in advanced configuration part.
To define it type “crontab -e” command and paste this setting:
*/5 * * * * env LANG=C /usr/local/mrtg-2/bin/mrtg /etc/mrtg/Cisco-MRTG.cfgAdvanced Configure
You may have notice some interface you may not want to monitor, or you don’t want the web page to display the IP address. You can custmize the Cisco-MRTG.cfg file in /var/www/html/Cisco-MRTG.according to your need by command vi /etc/mrtg/Cisco-MRTG.cfg
E.g.
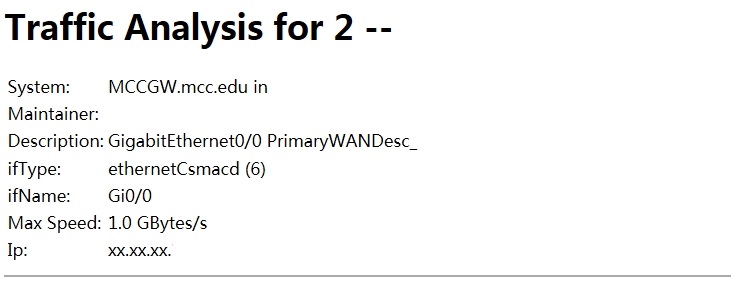
### Interface 2 >> Descr: 'GigabitEthernet0/0' | Name: 'Gi0/0' | Ip: '192.168.1.20' | Eth: '00-2c-c8-76-ff-c0' ###

Target[192.168.1.20_2]: [email protected]:
SetEnv[192.168.1.20_2]: MRTG_INT_IP="192.168.1.20" MRTG_INT_DESCR="GigabitEthernet0/0"
MaxBytes[192.168.1.20_2]: 1000000000
Title[192.168.1.20_2]: Traffic Analysis for 2 -- MCCGW.mcc.edu
PageTop[192.168.1.20_2]: <h1>Traffic Analysis for 2 -- MCCGW.mcc.edu</h1>
                <div id="sysdetails">
                        <table>
                                <tr>
                                        <td>System:</td>
                                        <td>MCCGW.mcc.edu in </td>
                                </tr>
                                <tr>
                                        <td>Maintainer:</td>
                                        <td></td>
                                </tr>
                                <tr>
                                        <td>Description:</td>
                                        <td>GigabitEthernet0/0 PrimaryWANDesc_ </td>
                                </tr>
                                <tr>
                                        <td>ifType:</td>
                                        <td>ethernetCsmacd (6)</td>
                                </tr>
                                <tr>
                                        <td>ifName:</td>
                                        <td>Gi0/0</td>
                                </tr>
                                <tr>
                                        <td>Max Speed:</td>
                                        <td>1.0 GBytes/s</td>                    // You can check if the speed here shows the correct speed.If not, change the string between td tag.
                                </tr>
                                <tr>
                                        <td>Ip:</td>
                                        <td>xx.xx.xx.20</td>                     // You may don't want to show the IP address if its a public one.
                                </tr>
                        </table>
                </div>
If you don’t want to show a interface, you can add # before all the lines regarding to that interface.
Now let’s poke around the work folder and see more configuration.
ls -l /var/www/html/Cisco-MRTG
There are a couple of files like , 192.168.1.20_2.html, 192.168.1.20_2.log, 192.168.1.20_2-day.gif, 192.168.1.20_2-week.gif, 192.168.1.20_2-month.gif, 192.168.1.20_3.html, 192.168.1.20_3.log, 192.168.1.20_3-day.gif, 192.168.1.20_3-week.gif, 192.168.1.20_3-month.gif The log file stores the information, which can be used for nagios or other monitoring software, and the gif files are the graph generated from the log file. To understand which files are which interface. you can check the index.html file:
vi /var/www/html/Cisco-MRTG/index.html
......
    <META HTTP-EQUIV="Refresh" CONTENT="300" >                              // so the interval in crontab should mirror this interval here.
    <META HTTP-EQUIV="Cache-Control" content="no-cache" >
    <META HTTP-EQUIV="Pragma" CONTENT="no-cache" >
    <META HTTP-EQUIV="Expires" CONTENT="Mon, 08 May 2017 06:11:33 GMT" >
    <LINK HREF="favicon.ico" rel="shortcut icon" >
......
Open a new browser. type http://URL/Cisco-MRTG/index.html
Open a subpage.
From the description and index number 2. we can know this report mapping to 192.168.1.20_2.html. If you want to create a report for this interface in Nagios, you can use the 192.168.1.20_2.log, we will talk about it in next part.
Integrate the MRTG with NAGIOS
If you’re monitoring bandwidth usage on your switches or routers using MRTG, you can have Nagios alert you when traffic rates exceed thresholds you specify. The check_mrtgtraf plugin (which is included in the Nagios plugins distribution) allows you to do this.
You’ll need to let the check_mrtgtraf plugin know what log file the MRTG data is being stored in, along with thresholds, etc. In my example, I’m monitoring one of the ports on a Cisco router. The MRTG log file is stored in /var/www/html/Cisco-MRTG/192.168.1.20_2.log. Here’s the service definition I use to monitor the bandwidth data that’s stored in the log file.
vi /usr/local/nagios/etc/objects/switch.cfg
define service {
    use                 generic-service ; Inherit values from a template
    host_name           Cisco_router
    service_description WAN Port Bandwidth Usage
    check_command       check_local_mrtgtraf!/var/www/html/Cisco-MRTG/192.168.1.20_2.log!AVG!1000000,2000000!5000000,5000000!10
}
To understand this command, in /usr/local/nagios/etc/objects/commands.cfg
define command{
        command_name    check_local_mrtgtraf
        command_line    $USER1$/check_mrtgtraf -F $ARG1$ -a $ARG2$ -w $ARG3$ -c $ARG4$ -e $ARG5$
        }
 -F, --filename=STRING
    File to read log from
 -a, --aggregation=(AVG|MAX)
    Test average or maximum
 -w, --warning
    Warning threshold pair <incoming>,<outgoing>  (in Bytes/sec)
 -c, --critical
    Critical threshold pair <incoming>,<outgoing> (in Bytes/sec)
 -e, --expires=INTEGER
    Minutes after which log expires
Check the Link status is UP or Down:
define service{
 use generic-service ; Inherit values from a template
 host_name TL-SG3424
 service_description Port 2 Link Status
 check_command check_snmp!-C g1c05m05 -o ifOperStatus.2 -r 1 -m RFC1213-MIB
 }
Switch port number:
The switchport labeled port 1 on your Cisco box is probably not index 1. If you wanted the status of GigabitEthernet0/1 you would want the status of the interface at index 10101, so your service would read like this actually:
-
define service{
use generic-service
host_name switchcisco
service_description Port 1 Status
check_command check_snmp!ifOperStatus.10101
}
UPtime showing time ticks
First of all double-checked if we are using the right OID number, go to the SNMP Object Navigator, search sysUpTime
-
http://snmp.cloudapps.cisco.com/Support/SNMP/do/BrowseOID.do?local=en&translate=Translate&objectInput=1.3.6.1.2.1.1.3
Then realised the unit is in time ticks instead of days, hours.
Regarding to this post: https://support.nagios.com/forum/viewtopic.php?f=7&t=42840
Plugin 2.0.2. works good, showing timeticks and human readable uptime. 2.2.0. shows only timeticks.
Then redownload the 2.02 plugin from https://nagios-plugins.org/download/, compile it, issue resolved.
MRTG does not work once the terminal is turned off
In Ubuntu, if you configured your personal profile encryption, after logging out, the service may not be able to read your configuration files in your home folder,it’s better to put the configuration file in another directory.
you need sudo permission to create the files in /var/www/Cisco-MRTG, and if you add following line in the
sudo crontab -e, it won’t run because, by default it will ask for password.*/5 * * * * env LANG=C /usr/local/mrtg-2/bin/mrtg /var/www/html/Cisco-MRTG/Cisco-MRTG.cfgThe work around is create a script file in
/etc/mrtg, with following content:env LANG=C /usr/local/mrtg-2/bin/mrtg /var/www/html/Cisco-MRTG/Cisco-MRTG.cfgThen use
sudo crontab -ecommand, and add following line:*/5 * * * * sudo sh /etc/mrtg/mrtgRefresh.sh
Then we bypass the password for this script.
sudo visudoAdded the following line to the end of the file:
administrator ALL=NOPASSWD: /home/administrator/mrtgRefresh.sh
Monitoring multiple devices
/usr/local/mrtg-2/bin/cfgmaker –global ‘WorkDir: /var/www/mrtg’ –output /tmp/server1.cfg [email protected]
/usr/local/mrtg-2/bin/cfgmaker –global ‘WorkDir: /var/www/mrtg’ –output /tmp/server2.cfg [email protected]
/usr/local/mrtg-2/bin/cfgmaker –global ‘WorkDir: /var/www/mrtg’ –output /tmp/router1.cfg [email protected]
You may wanna manually edit or review file before updating the main mrtg.cfg file. Use vi text editor to view all files:
vi /tmp/server{1,2}.cfg
Next, ipdate main config file by updating all /tmp/*.cfg config file:
cat /tmp/server{1,2}.cfg /tmp/router1.cfg >> /etc/mrtg/mrtg.cfg
Just create graphs for all devices:
LANG=C LC_ALL=C /usr/bin/mrtg /etc/mrtg/mrtg.cfg“
Reference
http://oss.oetiker.ch/mrtg/doc/mrtg-unix-guide.en.html
https://assets.nagios.com/downloads/nagioscore/docs/nagioscore/4/en/monitoring-routers.html
MRTG configuration reference: https://oss.oetiker.ch/mrtg/doc/mrtg-reference.en.html