Step 3. Azure APP proxy
Azure application proxy is a reverse proxy for publishing the NDES URL externally, and it does not need to open any ports on the corporate firewall.
Download the Azure AD Application Proxy connector
Perform the following steps to download the Azure AD Application Proxy connector. The setup file you download is copied to your App Proxy VM in the next section.
- Sign in to the Azure portal with a user account that has Enterprise administrator permissions in Azure AD.
- Search for and select Azure Active Directory at the top of the portal, then choose Enterprise applications.
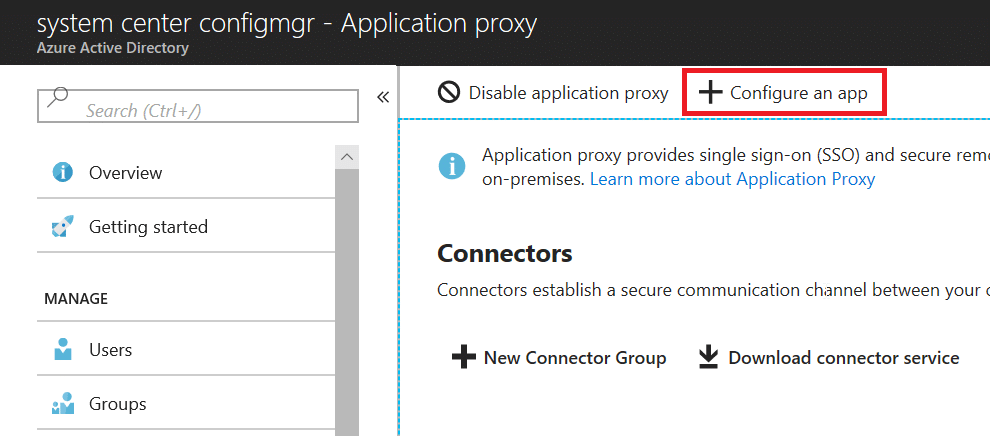
- Select Application proxy from the menu on the left-hand side. To create your first connector and enable App Proxy, select the link to download a connector.
- On the download page, accept the license terms and privacy agreement, then select Accept terms & Download.

Install and register the Azure AD Application Proxy connector
With a Server ready to be used as the Azure AD Application Proxy connector, now copy and run the setup file downloaded from the Azure portal.
- Copy the Azure AD Application Proxy connector setup file to your VM.
- Run the setup file, such as AADApplicationProxyConnectorInstaller.exe. Accept the software license terms.
- During the install, you’re prompted to register the connector with the Application Proxy in your Azure AD directory.
- Provide the credentials for a global administrator in your Azure AD directory. The Azure AD global administrator credentials may be different from your Azure credentials in the portal
Note: The global administrator account used to register the connector must belong to the same directory where you enable the Application Proxy service.
- If Internet Explorer Enhanced Security Configuration is turned on for the VM where you install the connector, the registration screen might be blocked. To allow access, follow the instructions in the error message, or turn off Internet Explorer Enhanced Security during the install process.
- If connector registration fails, see Troubleshoot Application Proxy.
- Provide the credentials for a global administrator in your Azure AD directory. The Azure AD global administrator credentials may be different from your Azure credentials in the portal
- At the end of the setup, a note is shown for environments with an outbound proxy. To configure the Azure AD Application Proxy connector to work through the outbound proxy, run the provided script, such as
C:\Program Files\Microsoft AAD App Proxy connector\ConfigureOutBoundProxy.ps1. - On the Application proxy page in the Azure portal, the new connector is listed with a status of Active, as shown in the following example:
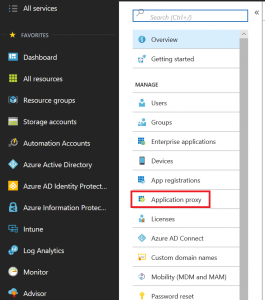
Logon the Azure portal, find Application Proxy:
Configure a APP:
- Give it a descriptive name, mine is IntuneNDES.
- Internal Url: your domain name in the LAN,mine is nhsndes01.curri.com
- external url: this will be calculated based on the name and your microsoft Primary domain by Azure. Mine is https://intunendes-curriccom.msappproxy.net/
- Pre Authentication: Passthrough
Save the change, and you can find it in the Enterprise Application, search the name, which is IntuneNDES in my case. You will come back here to check the URL for the SCEP Server URL.
Step 4. Request the Server SSL Certificate and Client cert
This step is very important, or else you will get error during request. On the NDES server, open mmc.exe, add the certificate Add-in for local computer. Navigate to Personal certificate store.
- Right-click Certificates and select All Tasks > Request New Certificate
- Find the Active Directory Enrollment Policy NDES Server, click “More information is required to enroll for this certificate. Click here to configure settings.” Type below:
- General Tab: Friendly Name: NDES SSL Certificate
- Extensions tab: Extended Key Usage(application policies): Server Authentication
- Subject tab: subject name:
- Common name – External FQDN of NDES server (e.g. intunendes-curriccom.msappproxy.net)
- Subject Alternative Name:
- DNS – External FQDN of NDES server (e.g. intunendes-curriccom.msappproxy.net)
- DNS – Internal FQDN of NDES server (e.g. ndes01.curric.com)
- Click OK.
- Click Enroll
Then we will request another one for Intune Certificate connector:
- Right-click Certificates and select All Tasks > Request New Certificate
- Find the Active Directory Enrollment Policy NDES Server, click “More information is required to enroll for this certificate. Click here to configure settings.” Type below:
- General Tab: Friendly Name: NDES Client Certificate
- Extensions tab: Extended Key Usage(application policies): Client Authentication
- Subject tab: subject name:
- Common name – Internal FQDN of NDES server (e.g. ndes01.curric.com)
- Subject Alternative Name:
- DNS – External FQDN of NDES server (e.g. intunendes-curriccom.msappproxy.net) , which is only required when deploying certificates for Android mobile devices.
- DNS – Internal FQDN of NDES server (e.g. ndes01.curric.com)
- Click OK. Click Enroll
Note that this cert is manually requested, we need to monitor this cert, follow this post for this procedure. http://frankfu.click/networking/monitor-network-syslog-snmp-net-flow/monitor-the-validity-period-of-a-certificate.html
Step 5 Install the Intune Certificate Connector
The Microsoft Intune Certificate Connector installs on the server that runs your NDES service. It isn’t supported to use NDES or the Intune Certificate Connector on the same server as your issuing Certification Authority (CA). You will need a user created on the Azure with below Roles and Licenses, although many places say this will need a global administration permission, but the least permission required is below:
Assigned roles
- Application administrator
- Intune administrator
Licenses:
- Enterprise Mobility + Security E3
To install the Certificate Connector
- On the NDES server, Sign in to the Azure portal (portal.azure.com).
- Locate the Intune blade and select Device Configuration
- From within the Device Configuration blade, select Certificate Connectors
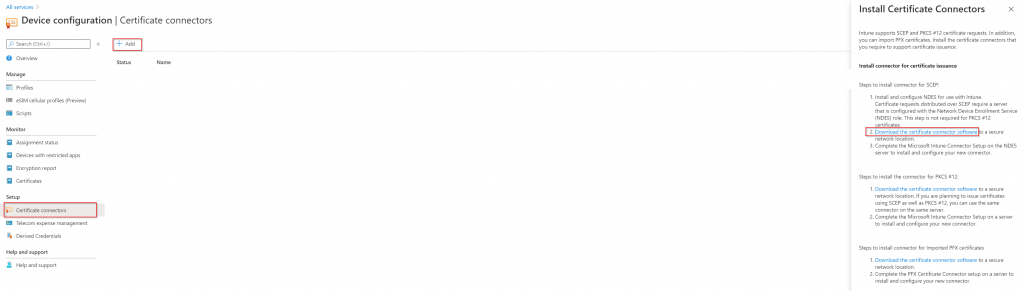
- Click on the + button in the top menu. In the new blade that opens, click on the link that says Download the certificate connector software under the SCEP section.
- After the download completes, go to the server hosting the Network Device Enrollment Service (NDES) role. Then:
- Confirm that .NET 4.5 Framework is installed, as it’s required by the Intune Certificate Connector. The .NET 4.5 Framework is automatically included with Windows Server 2012 R2 and newer versions.
- Right click on the file downloaded, Run as Administrator
- keep the default settings, click next until you see Installation options: Select SCEP and PFX Profile Distribution and click Next
- When prompted for the client certificate for the Certificate Connector, choose Select, and select the client authentication certificate you installed on your NDES Server during step 4, mine is NDES Client Certificate.
- Then click next multiple times until you see completed the Microsoft Intune connector setup wizard, tick Launch Intune connector and click Finish. If you forget to tick Launch Intune Connector, then go to C:\Program Files\Microsoft Intune\NDESConnectorUI , and run NDESConnectorUI.exe.
- Enrollment tab: sign in with the user created on the Azure early in Step 5.
- Advanced Tab: sign in with your ndes service account created in Prerequisite. Click Apply, you should see Successfully enrolled
- go to Services.msc, you should find “Intune Connector Service” up and running.
- Logs will be available for troubleshooting:
- C:\Program Files\Microsoft Intune\NDESConnectorSvc\Logs\Logs (that’s right, two Logs folders)
- C:\Program Files\Microsoft Intune\NDESPolicyModule\Logs
- C:\inetpub\logs\LogFiles\W3SVC1
To validate that the service is running, open a browser, and enter the following URL. https://<FQDN_of_your_NDES_server>/certsrv/mscep/mscep.dll
It should return a “403 error,Forbidden (0x8000ffff), You do not have permission to view this directory or page.” which is normal. Because this is taken over by APP proxy now.
Go to the Azure Active directory > Application Proxy, you should see the connection is active.
Now if you go back to Azure > Enterprise Application, Search your Application Proxy you created in Step 3. (IntuneNDES for me), go to the Properties, you will find the Homepage URL, copy this for Step 6.
Then we will creat a SCEP profile to deploy the Cert.
Now in the NDES service machine cert store, you will find a cert issued by Microsoft Intune Certificate Connector CA.
This certificate is used to secure
- the messages exchanged between Intune and the NDES (SCEP service) via the connector, as well as
- the cert enrolment request message (CSR package) that the device sends out to NDES (SCEP service)
NOTE: The RA certs (both the CEP Encryption and Exchange Enrollment Agent) are still required for the NDES service to be functional.
Step 6. Create a Trusted Root Certificate profile and SCEP profile
Create a trusted Root Certificate profile
First, log on your CA, export the Root certificate as a cer file. ( https://support.microsoft.com/en-us/help/555252)
- Sign in to the Azure portal (portal.azure.com).
- Locate the Intune blade and go into Device Configuration.
- Select Profiles and click Create profile.

- Give the profile a suitable name (NHS Trusted Root Certificate for me), select Windows 10 and later as the platform and finally select Trusted certificate as the profile type. Browse to the certificate file (<cert_name>.cer) and select the destination store depending on the type of certificate you’re uploading.
- Click OK to create the profile.
- Assign the Trusted Certificate to your devices and ensure it can be installed successfully
Create a SCEP profile
- Sign in to the Azure portal (portal.azure.com).
- Locate the Intune blade and go into Device Configuration.
- Select Profiles and click Create profile.
- Give the profile a name, select Windows 10 and later under platform and select SCEP Certificate under profile type.
- Info need to reflect the template we setup before ( IntuneUser ), as below:
-
Certificate type: UserSubject name format: CN={{UserName}},E={{EmailAddress}}Subject alternative name: User principal name (UPN) – {{UserPrincipalName}}
-
Certificate validity period: 1 YearsKey storage provider (KSP): Enroll to Software KSPKey usage: Key encipherment, Digital signatureKey size (bits): 2048Hash algorithm: SHA-2Root Certificate: NHS Trusted Root CertificateExtended key usage:Client Authentication: 1.3.6.1.5.5.7.3.2Renewal threshold (%): 19 ( as per IntuneUser certificate template configuration in Step 1 . 10 weeks / 52 weeks )SCEP Server URLs: the one you find in the Enterprise Application.
- Then select the user group you want to apply, Click OK to finish.
-
Now if you re-login on the user within the group, Go to MMC.exe, add snip-in, select Certificates, current user. go to Personal, and you should see the user got a cert .
Logon the CA, check the Issued Cert, there should be a new one with the requester name as the Service name on NDES server (mine is NDES).

So far the SCEP profile infrastructure has completed, next page I will show how to integrate with campus wifi with a User cert.